Wednesday, August 7, 2024

Terrain: Where the streets have no name - roads made from Fake Fur and Acrylic Caulking

Unpaved roads were next on my to-do list and of course, these should also be flexible so that they can adapt to hilly terrain.

The starting material was again fake fur, which I trimmed short at the edges and completely shaved off where the actual roadway runs.
Next came the colouring of the strips I left on the sides of the roads with various shades of brown and green as they should represent gras and so on..

After this had dried, I applied acrylic caulking with a palette knife, sprinkled sand over the wet mixture, smoothed it out with a narrow rolling pin and then pressed in some tracks.
As soon as the acrylic-sand mixture was completely dry (after about 24 hours), it was ready to be painted.

I still need a few more junctions and some narrower paths, which I will be building soon, before I want to try whether this method can also be used to create paved roads.
All in all I´m. happy how these roads turned out.

The finished roads and junctions so far:

My completed roads and junctions so far.

The straight ones ...

... and the curvy pieces.

Crossing and junction

15mm and 28mm miniatures and vehicles for size comparison.

Here you can see how flexible the sections are and how they can adapt to the ground.


Click here for a small how-to:

Tutorial: How I make Wheat Fields and Grassland from Fake Fur

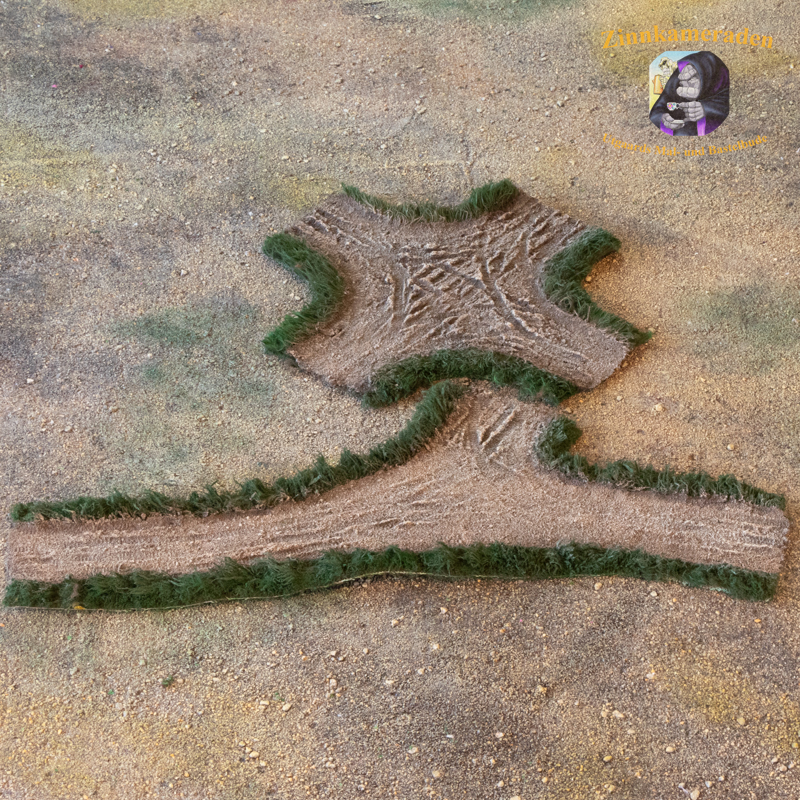
Here is a little "How To" on how I make my fake fur fields and meadows.
There are countless techniques to achieve the same (and better) results, but this is the one that:
a) works best for me
b) is a good compromise between effort and time

I would recommend testing different techniques, as I did, as this is the only way to find the technique that suits you best.


First things first:
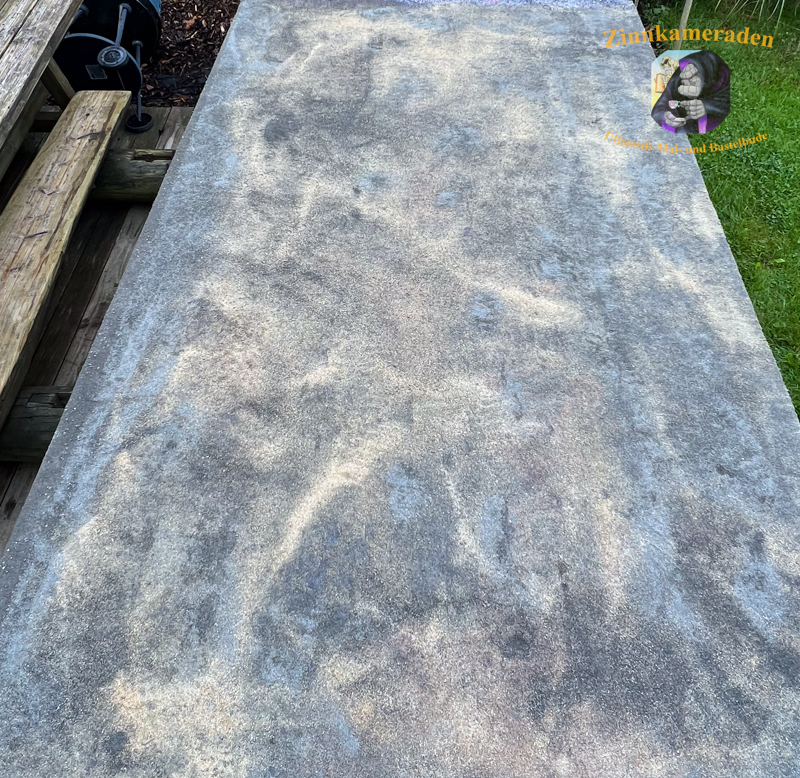
- It is advisable to wash the fabric thoroughly beforehand to remove any residue that could prevent the colour from sticking to the fabric later.

- Cut the fur to size and then gradually trim it to the desired length using a shaver (preferably one for small animals, as these devices are more robust), in my case 16mm.
I use different attachments for this and trim the length down step by step to the desired length.
Then use scissors to trim the fur in different places to achieve a natural look.

- Each layer of colour must be applied repeatedly from all sides and then always brushed in immediately. It is better to repeat this several times than to apply too much colour at once, because then the hairs of the fake fur will clump together!

- The colour must be allowed to dry between the individual layers, but the time can be shortened with a hair dryer.

- Take your time and don´t rush through the needed steps.


Lets get started with ...


In addition to the fake fur, you will need a shaver, scissors, various brushes and combs, as well as brushes in different sizes. I use inexpensive paintbrushes here, as they are quite strained when applying the paint to the fur.

The fur is cut to size and trimmed to the desired length.

The first layer of colour has been worked in, a dark mix of brown and green forms the basis of my wheat fields.

A bit of Sun-Yellow added to the above mix forms the next layer,

... followed by adding even more Sun-Yellow to the mix.

The next layer applied - this time pure Sun-Yellow. The difference to the previous step is clearly visible in comparison to the field in the background.

The next layer was mixed from a bit of Beige (Pale Sand) that I´ve added to the Sun-Yellow.


Starting with this step, the colour is only applied very lightly and in different places to the upper third of the hair, no longer to the entire surface.
This creates a natural "lively" look.

More Beige/Pale Sand added. This means that the appearance of the field comes closer and closer to its model when the wheat is ripe for harvesting.

Pure Beige/Pale Sand added as highlights - do this like you would do a Drybrush on miniatures, buildings, or bases. Now just comb in very lightly to blend in the highlight.

My finished Wheat Fields ...

... and the real thing.


I hope this little how-to is helpful for some of you when building your own fields and/or meadows.

I will answer questions in the comments as quickly and as well as possible, but this is only a hobby blog and so an answer can sometimes take a while if I have little time for the hobby.


Monday, August 5, 2024

Terrain: 50 Shades of Green? - Grassland terrain finished too now

After my different pieces of wheat fields were finished it was time to add more variety to my battlefields, so grassland comes next.

Starting materials were again fake fur, acrylic paste and lots of colours (both normal acrylic paints and spray cans), combs, brushes, clippers, scissors - and again much time of course 😂

Not Fifty, but a lot shades of Green 😅

These pieces are made using different spray cans - this will not become my preferred method


Made using Acrylic paints - a bit to vibrant in the end.


Acrylic paints again - these shade of colour is much more suitable for the Mediterranean, right?


After trying different versions how to paint/spray these fields of Grassland and the Wheat Fields my preferred method to make these kind of fields will be using acrylic paints.
It´s more time consuming but you have a much greater choice of colours because, unlike spray cans, you can mix the colours as you like, and you are independent of the weather because you can also work with acrylic paints indoors.
The disadvantage is that you need considerably more time - from applying the colours, to combing them into the fake fur, to the drying times.


And here is a short tutorial how I made them:

Friday, August 2, 2024

Terrain: Wheat fields

In order to fill my new mat with life, I need not only buildings and trees etc. but also meadows and fields, so I set to work, starting with the Wheat fields first.
The aim was to create flexible pieces that can adapt to an irregular surface and that they work for both 15mm and 28mm miniatures.
And for both conditions: Mission accomplished 😎

The starting materials for this are fake fur, acrylic paste and lots of colours (both normal acrylic paints and spray cans), combs, brushes, clippers, scissors and above all: lots of time.

After trimming the coat to the desired length, there are 2 possible techniques (or any combination of them):
- Spraying on the colour using spray cans, followed by brushing it into the coat.
- Brushing on normal acrylic paint, which is then brushed into the coat.

In the end, the best version for me turned out to be combing in normal acrylic paint, especially as you are also less dependent on the weather, as I can (and only want to) use spray cans outdoors.

If there is enough interest, I could create a tutorial on how I built the terrain pieces.


But for now without further ado, here are the finished wheat fields:

All the different versions of wheat fields at a glance.

The classic ‘golden’ wheat field - well, at least as one (me) imagines it 😎

Size comparison with 15mm and 28mm.

With a bit of Green it can be used to represent still unripe wheat.


The version I finally decided on

This is what a wheat field looks like now and shortly before the harvest starts.


And here is a short tutorial how I made them:

Sunday, July 28, 2024

Terrain: My new gaming mat for more Arid Regions

As the size of my gaming table has grown to 2.10 x 1.30 metres and my previous gaming mat was designed more for Central Europe/North America (too much vivid greens), it was time to build a new mat.

I used painter's fleece as the fabric, onto which I then applied acrylic caulking using a spatula and a rolling pin and into which I then worked sand in various colours and grain sizes.

After everything had been allowed to dry thoroughly for 24 hours, I then coloured everything, added different shades, highlights and colour variations so that the surface of the mat looks ‘alive’.
Finally, I cut the mat to a size of 2.50 x 1.60 metres, so I should be prepared for all eventualities 😅

The new mat represents rather dry regions such as Sicily, Tunisia or the Levant much better than my previously used mat, which has since been sold to Norway 😎


Detailed view of the surface texture

The WiP stage

After applying the acrylic caulking I have added the first layer of sand and then pressed everything down firmly with a rolling pin.

Colouring started: Base colours and the first highlights are applied to the mat.


Friday, July 19, 2024

Warmaster Revolution: A new Wizard for my Demons has spawned 😎

My Warmaster Demons received another reinforcement today - a mighty Wizard joins the ranks of my still growing Demon Horde 💪

The STL comes from Tordo Miniatures again and as always I printed it using the proved TGM-7 resin.

I used my airbrush to paint a figure for the first time, in this case for the colour transitions on the feathers - I'm quite happy with the result, even if it still requires a lot of practice.


Freshly materialised through the dimension gate:


And some photos from the WiP stage: